dnspod public dns 初体验
最近腾讯DnsPod新出了一个产品——个性化dns,可以自定义拦截列表,用于拦截广告,追踪器。国内以前也要类似的产品,比如红🐟之类的。
我只以前用树莓派搭过adguard home,用于在家里拦截广告,追踪器。这样做的好处是只需要在网关上设置,不需要在家里每个设备上单独设置了。但用树莓派的不足之处在于出门不能使用(废话),解析时间略长(50-60ms,约长一倍)。
现在新推出的dnspod处于公测期间,可以免费无限量使用,正好拿来试试水。
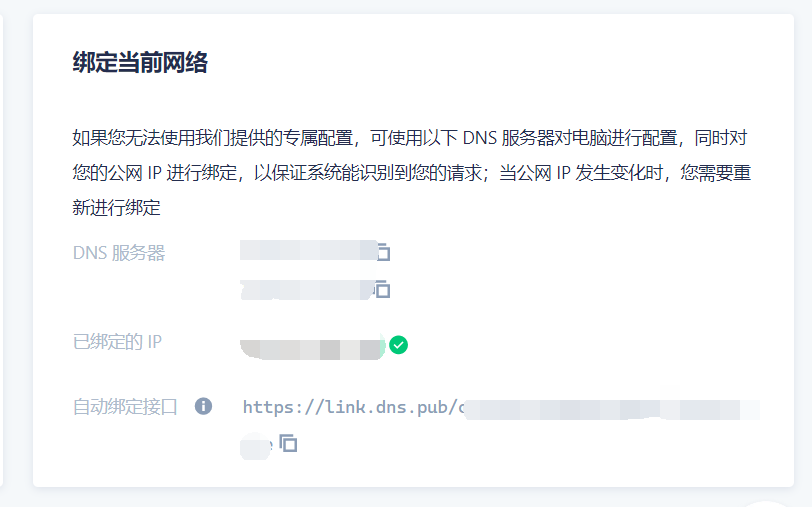
从dnspod中进入公共解析,完成创建后可以看到下面这个界面。

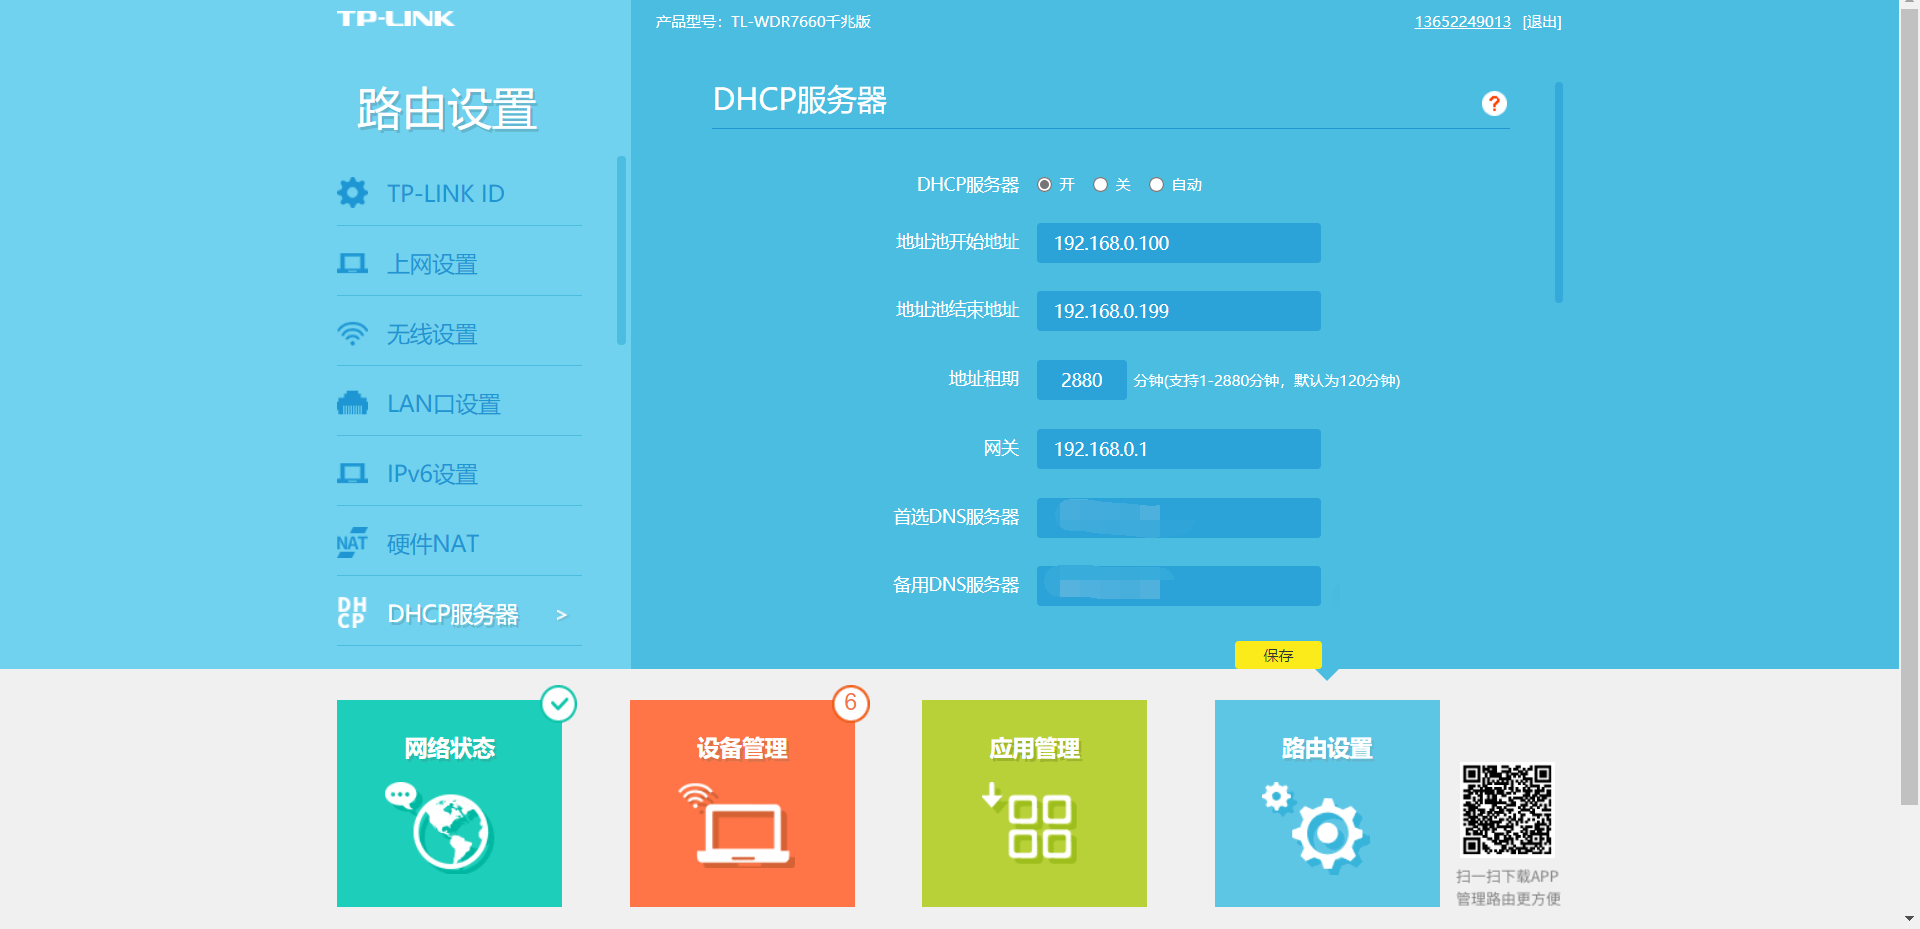
然后只需要把dns服务器地址设为路由器dhcp服务器里面就行了
TP-LINK打钱
由于dnspod的IPv4地址不能为所有客户1对1的给一个地址,必须将你的地址绑定到你的账户上
家里用的宽带一般是动态IP,每天都会变,而我们又不可能每天都登录dnspod来手动绑定,所以推出了一项功能叫自动绑定接口。
只要变化的IP后访问了这个接口(GET请求),就会自动绑定。那么我们只需要把这个地址设为我们浏览器的启动页就好了。
(这真的是最合理的办法了啊)
第二种方法,写一个python脚本访问,不过你要加启动项或者每天自己点
1 | |
Recently, Tencent’s DNSPod launched a new product—personalized DNS, which allows custom blocklists for intercepting ads and trackers. There have been similar products in China before, like Red Fish and others.
I previously set up AdGuard Home on a Raspberry Pi to block ads and trackers at home. The advantage of this approach is that you only need to set it up on the gateway without configuring each device individually. However, the downside of using a Raspberry Pi is that it cannot be used outside the home (obviously) and the resolution time is slightly longer (50–60 ms, about double the usual).
The newly launched DNSPod product is currently in public beta, with unlimited free usage, making it a great opportunity to try it out.
After entering DNSPod’s public resolution feature and completing the setup, you’ll see the following interface:
Then, you just need to set the DNS server address in your router’s DHCP server:
TP-LINK: Pay up!
Since DNSPod cannot assign a unique IPv4 address to every user, you must bind your IP address to your account:
Home broadband connections typically use dynamic IPs, which change daily, and it’s impractical to manually log into DNSPod every day to bind the IP. To solve this, an automatic binding interface feature was introduced.
Whenever your IP changes, accessing this interface (via a GET request) will automatically bind it. The simplest way is to set this address as your browser’s startup page.
(This really is the most reasonable solution.)
The second method involves writing a Python script to access the interface, though you’d need to add it to startup or run it manually each day:
1 | |