Flashing OpenWrt on Xiaomi R3G After Installing Breed
前言
挺早之前打算买个路由器玩,因为学了网络技术这么久都没用上,很想玩。
其次宿舍里打游戏有时候要局域网,总是开热点不方便。所以整个路由器刷个openwrt是个不错的选择。
一开始我打算选随身wifi,但是发现那高通CPU太弱了,根本带不动游戏联机,所以买了台据说对标K2P的R3G。
因为第一次刷breed和openwrt,网上没有什么现成的教程。七零八碎,版本也不对的教程看的挺难受,一路上挺坎坷的,终于成功之后记录一下过程。
打开SSH
先刷入开发版的ROM。将下载的ROM包复制到FAT32格式U盘的根目录,并重命名为miwifi.bin ,同时确保该目录下不存在其它“.bin”文件,若存在会导致刷机失败。
https://www.miwifi.com/miwifi_download.html
断开小米路由器的电源,将U盘插入路由器USB接口;
按住reset键,接通电源,等待指示灯变为黄色闪烁状态后松开reset键,路由器开始刷机;
等待刷机完成,整个过程约为3-5分钟,完成后系统会自动重启。路由器指示灯变蓝刷机完成;如果出现异常、失败、U盘无法读取的状况,会进入红灯状态,建议重试或更换U盘再试。
手机要装MiWIFI的APP,然后绑定账号(不然用不了SSH)。绑定之后访问这个网站,下载SSH工具包。
https://d.miwifi.com/rom/ssh
也可以去看看什么强开SSH,但是有人反馈强开SSH得到的shell刷机失败
请将下载的工具包bin文件复制到U盘(FAT/FAT32格式)的根目录下,保证文件名为miwifi_ssh.bin;
断开小米路由器的电源,将U盘插入USB接口;
按住reset按钮之后重新接入电源,指示灯变为黄色闪烁状态即可松开reset键;
等待3-5秒后安装完成之后,小米路由器会自动重启,之后您就可以尽情折腾啦 :)
尝试SSH访问。因为路由器上的dropbear版本很古典,必须加额外参数兼容那个古老的算法。
1 | |
否则无法连接,会出现出现
1 | |
当时因为没有网线,然后绑定账号必须要用手机APP。我用电脑共享到有线网到路由器,重置路由器好多次都不行,搞了好久。所以看到还挺激动的。
备份原始数据
每台机器的备份有略微不同,混用同一型号其他机器的备份可能会导致信号很差。cat /proc/mtd查看分区表,然后依次备份
1 | |
还原备份
1 | |
刷breed
当时很担心成砖,所以上一步备份我备份了三次,都比较了CRC32,发现均相同才敢接着刷。
(其实现在想起来没必要这么谨慎,但是也挺好的习惯)
下载breed,在目录里搜索文件名包含R3G的文件,下载
https://breed.hackpascal.net/
使用WinSCP来传输文件到临时目录,协议使用SCP,不要用SFTP。(注意,FileZilla因为只支持SFTP,所以用不了。)
这个网站下载的是最新版,截止目前的时间,是1.2版本,和1.1版本的Web操作有较大差异。
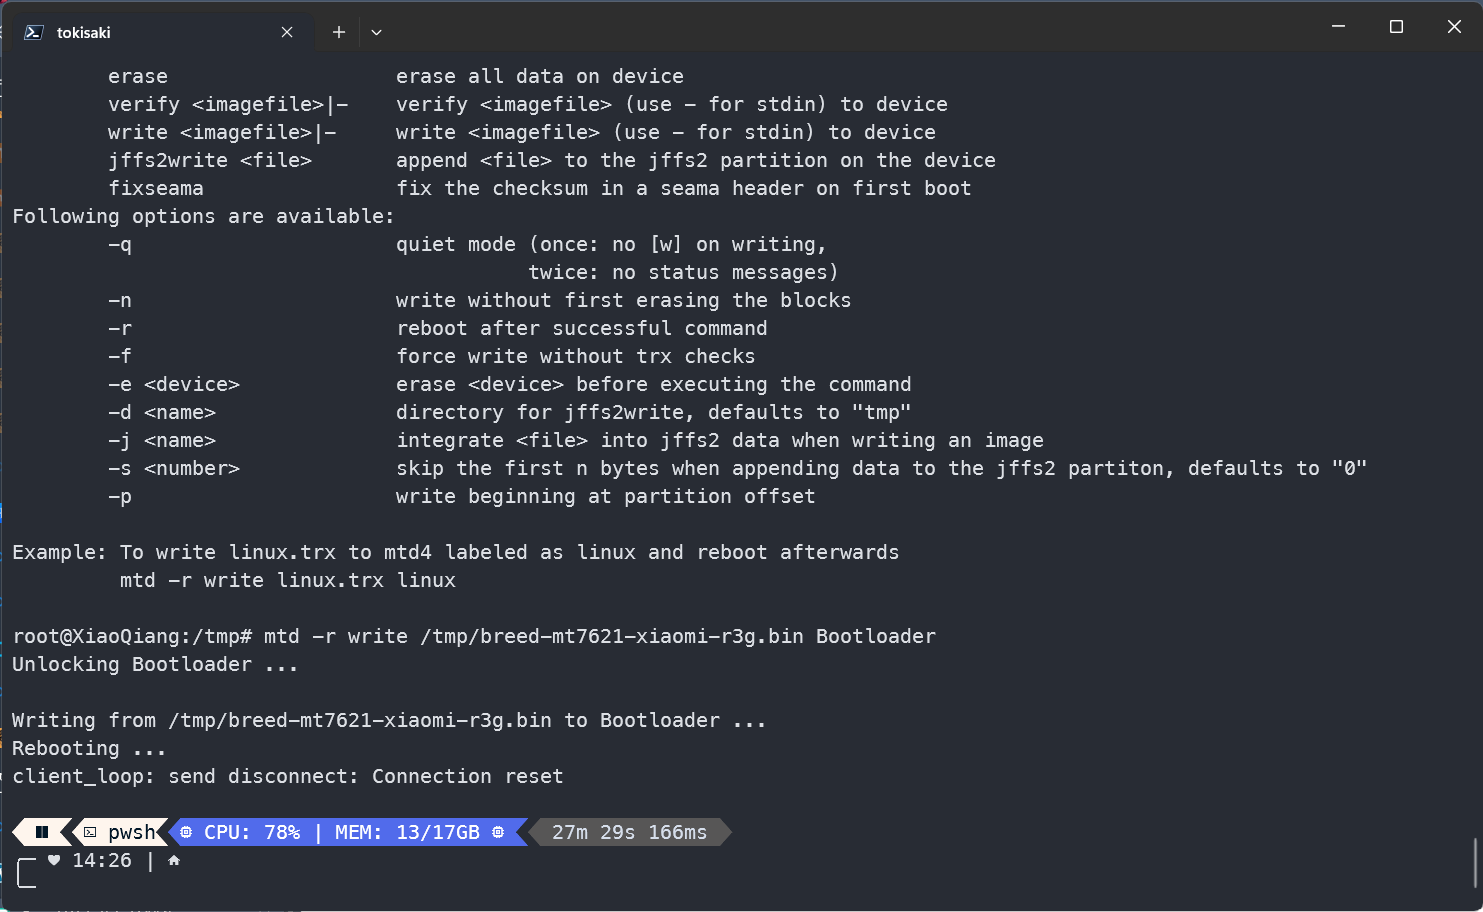
1 | |
确认完成之后,按住RESET键开机。
等到路由的灯闪烁时候,松开RESET键,浏览器访问192.168.1.1。(一般情况下不需要手动分配IP地址,有DHCP)

在控制台中备份
备份EEPROM和编程器固件。其中最重要的是EEPROM。
breed控制台刷入openwrt
使用的是这个版本的openwrt
https://www.right.com.cn/forum/forum.php?mod=viewthread&tid=8303844
下载底包,然后上传。
在v1.2的breed中,只用选rootfs0和kernel1两个文件,外加闪存布局写Openwrt就可以,不需要额外设置环境变量,挺方便的。
勾上刷机之后自动重启,然后慢慢等,千万别断电就好。
据说v1.1的要设环境变量才能启动
进入OPENWRT之后,不要以为结束了,需要继续进行固件更新,更新文件sysupgrade.bin。
一些其他的问题
1 | |
上述命令中nvram是uboot专有命令,Breed与uboot相互独立,参数不共用,根据国外论坛对于小米路由器原厂uboot的分析,小米路由器的kernel0包含的usb恢复的功能,就是将官方固件命名为miwifi.bin放入U盘内,断电时插入路由器,用硬物抵住reset键后插电,保持10秒左右,待黄灯快速闪动后可松手,可恢复至官方固件,这个功能可用于原厂固件损坏后的修复,也算是不错的功能,所以OpenWrt官网上的建议是将内核文件刷入kernel1
更新源
1 | |
1 | |
Introduction
Some time ago, I planned to buy a router to play with, since I had studied networking for a long time without practical application and was eager to experiment with it. Also, for gaming in the dorm, having a local network was often needed, and constantly turning on a hotspot was inconvenient. So, getting a router and flashing OpenWrt seemed like a good choice. Initially, I considered portable Wi-Fi devices, but found their Qualcomm CPUs too weak to handle game connectivity, so I went for the R3G, which is said to be comparable to the K2P. As it was my first time flashing Breed and OpenWrt, and there were no ready-made tutorials online – just scattered, often outdated posts – the process was quite bumpy. After finally succeeding, I decided to document the journey.
Enabling SSH
First, flash the developer ROM. Copy the downloaded ROM package to the root directory of a FAT32 formatted USB drive and rename it to miwifi.bin. Ensure no other “.bin” files exist in that directory, as this could cause the flash to fail.
Disconnect the power from the Xiaomi router, insert the USB drive into the router’s USB port;
Hold down the reset button, then connect the power. Wait for the indicator light to start flashing yellow before releasing the reset button. The router will begin flashing;
The process takes about 3-5 minutes. Once complete, the system will automatically reboot. The router’s indicator light will turn blue upon successful completion. If an error, failure, or inability to read the USB drive occurs, the light will turn red. In such cases, retry or use a different USB drive.
Install the MiWiFi app on your phone and bind your account (otherwise SSH won’t work). After binding, visit this website to download the SSH toolkit.
You could also look into methods for forcibly enabling SSH, but some reports indicate that doing so resulted in shell flash failures.
Copy the downloaded bin file to the root directory of a FAT/FAT32 formatted USB drive, ensuring the file is named
miwifi_ssh.bin;
Disconnect the power from the Xiaomi router, insert the USB drive into the USB port;
Hold down the reset button, then reconnect the power. Release the reset button once the indicator light starts flashing yellow;
Wait 3-5 seconds for the installation to finish. The Xiaomi router will automatically reboot, after which you can start tinkering :)
Test SSH access. Because the dropbear version on the router is quite old, additional parameters must be added to support the legacy algorithm.
ssh -oKexAlgorithms=+diffie-hellman-group1-sha1 -oHostKeyAlgorithms=+ssh-dss -oCiphers=+3des-cbc root@192.168.31.1
Otherwise, the connection will fail with:
Unable to negotiate with 192.168.31.1 port 22: no matching key exchange method found.
Their offer: diffie-hellman-group-exchange-sha1,diffie-hellman-group14-sha1,diffie-hellman-group1-sha1
Back then, I didn’t have an Ethernet cable, and binding an account required the mobile app. I tried sharing the computer’s connection to the router via Ethernet and resetting the router multiple times without success. It took a long time to figure out, so seeing the prompt was quite exciting.
Backing Up Original Data
Each device’s backup is slightly different. Using backups from another device of the same model might result in poor signal.
Check the partition table using cat /proc/mtd, then back up each partition sequentially.
dd if=/dev/mtd0 of=/extdisks/sda/ALL.bin
dd if=/dev/mtd1 of=/extdisks/sda/Bootloader.bin
dd if=/dev/mtd2 of=/extdisks/sda/Config.bin
dd if=/dev/mtd3 of=/extdisks/sda/Bdata.bin
dd if=/dev/mtd4 of=/extdisks/sda/Factory.bin
dd if=/dev/mtd5 of=/extdisks/sda/crash.bin
dd if=/dev/mtd6 of=/extdisks/sda/crash_syslog.bin
dd if=/dev/mtd7 of=/extdisks/sda/reserved0.bin
dd if=/dev/mtd8 of=/extdisks/sda/kernel0.bin
dd if=/dev/mtd9 of=/extdisks/sda/kernel1.bin
dd if=/dev/mtd10 of=/extdisks/sda/rootfs0.bin
dd if=/dev/mtd11 of=/extdisks/sda/rootfs1.bin
dd if=/dev/mtd12 of=/extdisks/sda/overlay.bin
dd if=/dev/mtd13 of=/extdisks/sda/ubi_rootfs.bin
dd if=/dev/mtd14 of=/extdisks/sda/data.bin # This line may fail due to device busy, which is fine.
Restoring Backups
mtd write /extdisks/sda/Bootloader.bin Bootloader
mtd write /extdisks/sda/Config.bin Config
mtd write /extdisks/sda/Bdata.bin Bdata
mtd write /extdisks/sda/Factory.bin Factory
mtd write /extdisks/sda/crash.bin crash
mtd write /extdisks/sda/crash_syslog.bin crash_syslog
mtd write /extdisks/sda/reserved0.bin reserved0
mtd write /extdisks/sda/kernel0.bin kernel0
mtd write /extdisks/sda/kernel1.bin kernel1
mtd write /extdisks/sda/rootfs0.bin rootfs0
mtd write /extdisks/sda/rootfs1.bin rootfs1
mtd write /extdisks/sda/overlay.bin overlay
mtd write /extdisks/sda/ubi_rootfs.bin ubi_rootfs
Flashing Breed
I was quite worried about bricking the device at that time, so I backed up in the previous step three times, comparing CRC32 checksums to ensure they were identical before proceeding to flash. (Looking back, it probably wasn’t that necessary to be so cautious, but it’s a good habit anyway.)
Download Breed. Search within the directory for a file whose name contains “R3G” and download it.
Use WinSCP to transfer the file to a temporary directory, using the SCP protocol, not SFTP. (Note: FileZilla only supports SFTP, so it cannot be used.)
The file downloaded from this site is the latest version. As of now, it’s version 1.2, which has significant operational differences in the web interface compared to version 1.1.
mtd -r write /tmp/XXX.bin Bootloader
Once confirmed, hold down the RESET button and power on.
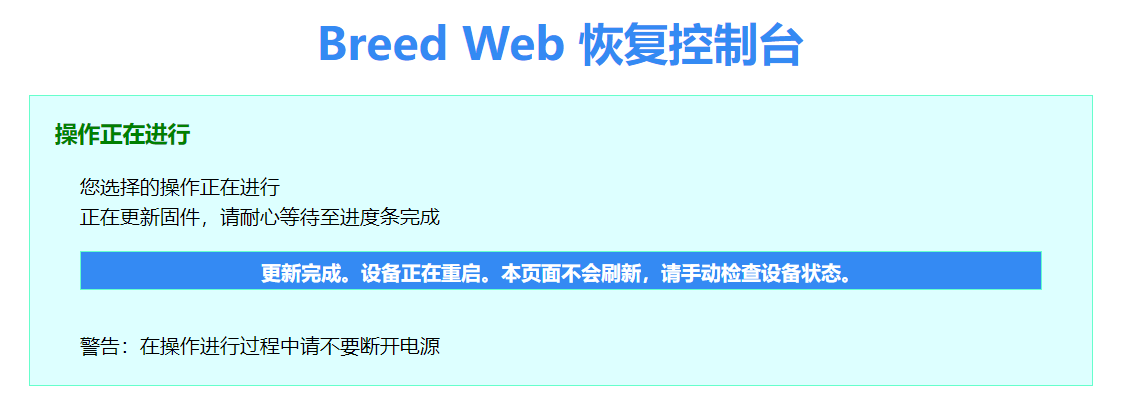
When the router’s light starts flashing, release the RESET button and access 192.168.1.1 in a browser. (Typically, no manual IP address assignment is needed; DHCP is available.)
Backing Up in the Console
Back up the EEPROM and the programmer firmware. The EEPROM is the most important.
Flashing OpenWrt via the Breed Console
I used this version of OpenWrt.
Download the base package and upload it.
In Breed v1.2, you only need to select the rootfs0 and kernel1 files, and set the flash layout to OpenWrt. No additional environment variable settings are needed, which is quite convenient.
Check the option to automatically reboot after flashing, then wait patiently—just don’t power off.
Reportedly, v1.1 requires setting environment variables to boot.
Once inside OPENWRT, the process isn’t over. You need to proceed with a firmware update using the sysupgrade.bin file.
Some Other Issues
mtd write mir3g-squashfs-kernel1.binkernel1
mtd write mir3g-squashfs-rootfs0.binrootfs0
nvram set flag_try_sys1_failed=1
nvram commit
reboot
The nvram command in the above instructions is specific to U-Boot. Breed and U-Boot are independent of each other, and their parameters are not shared. According to analysis by international forums on the original Xiaomi router U-Boot, kernel0 contains USB recovery functionality. Specifically, by renaming an official firmware to miwifi.bin, placing it on a USB drive, powering off the router, inserting the USB drive, holding the reset button with a hard object while connecting the power, and holding for about 10 seconds until the yellow light flashes rapidly, you can release the button. This can restore the original firmware, which is a useful feature for recovering from a corrupted original firmware. Therefore, the recommendation on the OpenWrt website is to flash the kernel file into kernel1.
Updating Sources
src/gz immortalwrt_core https://mirror.sjtu.edu.cn/immortalwrt/snapshots/targets/ramips/mt7621/packages
src/gz immortalwrt_base https://downloads.immortalwrt.org/snapshots/packages/mipsel_24kc/base
src/gz immortalwrt_luci https://downloads.immortalwrt.org/snapshots/packages/mipsel_24kc/luci
src/gz immortalwrt_packages https://downloads.immortalwrt.org/snapshots/packages/mipsel_24kc/packages
src/gz immortalwrt_routing https://downloads.immortalwrt.org/snapshots/packages/mipsel_24kc/routing
src/gz immortalwrt_small8 https://downloads.immortalwrt.org/snapshots/packages/mipsel_24kc/small8
src/gz immortalwrt_telephony https://downloads.immortalwrt.org/snapshots/packages/mipsel_24kc/telephony
src/gz immortalwrt_core https://mirrors.cloud.tencent.com/openwrt/snapshots/targets/ramips/mt7621/packages
src/gz immortalwrt_base https://mirrors.cloud.tencent.com/openwrt/snapshots/packages/mipsel_24kc/base
src/gz immortalwrt_luci https://mirrors.cloud.tencent.com/openwrt/snapshots/packages/mipsel_24kc/luci
src/gz immortalwrt_packages https://mirrors.cloud.tencent.com/openwrt/snapshots/packages/mipsel_24kc/packages
src/gz immortalwrt_routing https://mirrors.cloud.tencent.com/openwrt/snapshots/packages/mipsel_24kc/routing
src/gz immortalwrt_small8 https://mirrors.cloud.tencent.com/openwrt/snapshots/packages/mipsel_24kc/small8
src/gz immortalwrt_telephony https://mirrors.cloud.tencent.com/openwrt/snapshots/packages/mipsel_24kc/telephony