DnsPod and Cloudflare Enable DNSSEC
DNSSEC介绍
DNSSEC 可抵御伪造的 DNS 应答。受 DNSSEC 保护的区域将通过密码进行签名,以确保收到的 DNS 记录与域所有者发布的 DNS 记录相同。
cloudflare开启DNSSEC
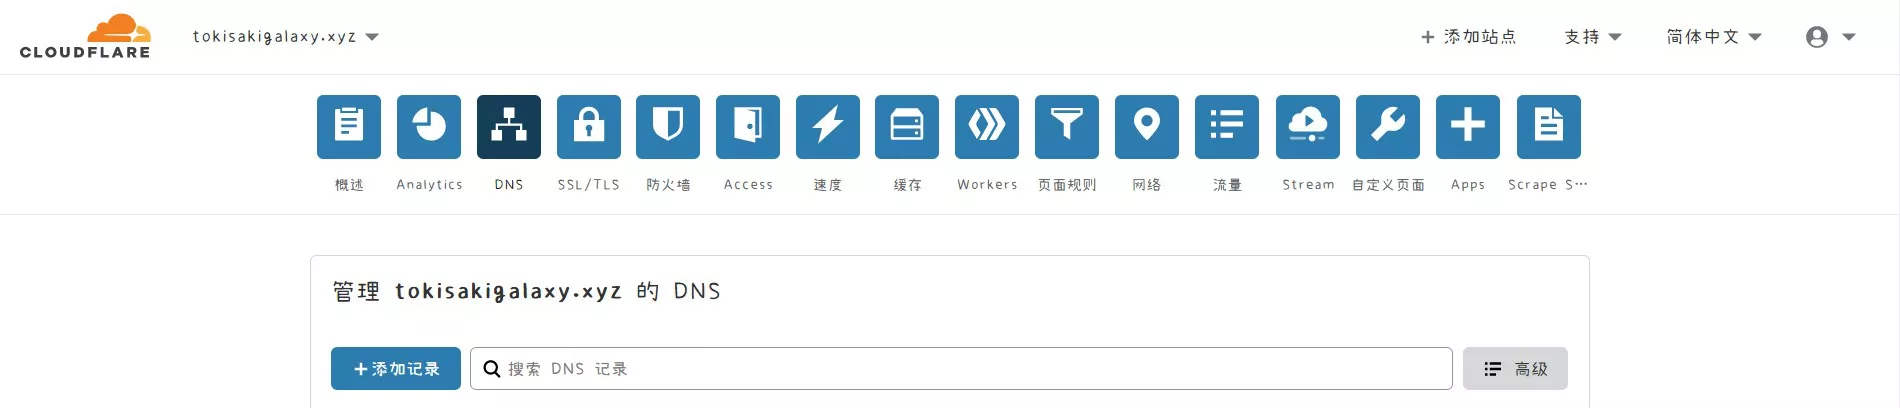
首先在cloudflare中打开dns页面
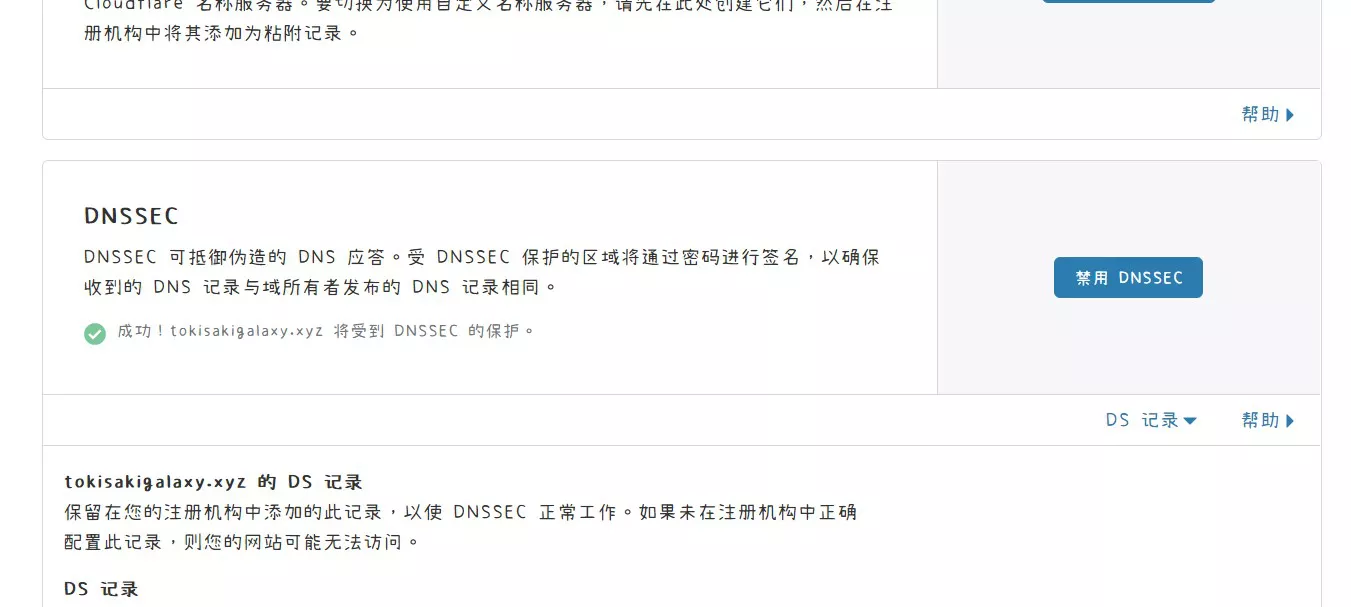
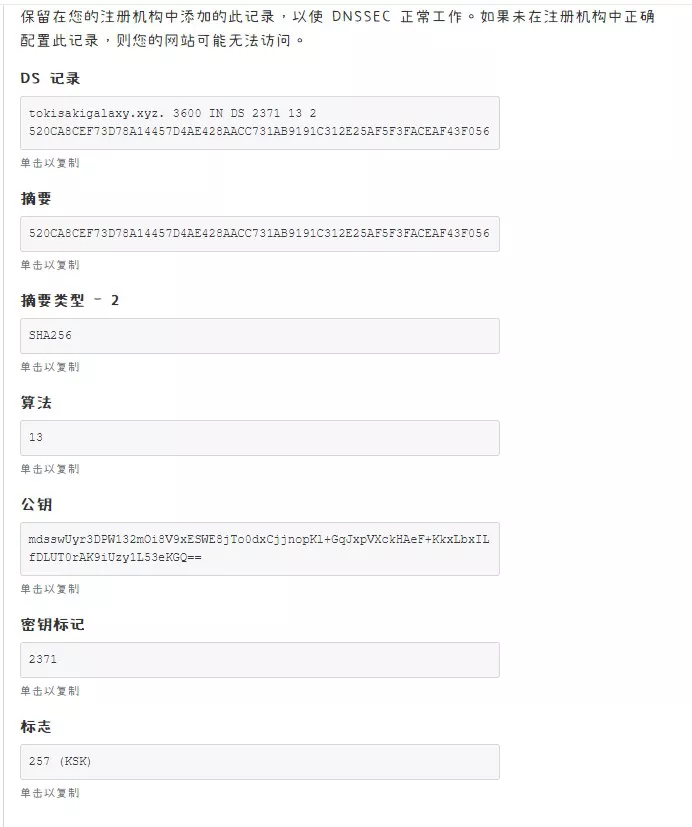
下滑找到DNSSEC,点击启用,并且点击右下角那个DS 记录展开。
打开腾讯云DNSSEC功能
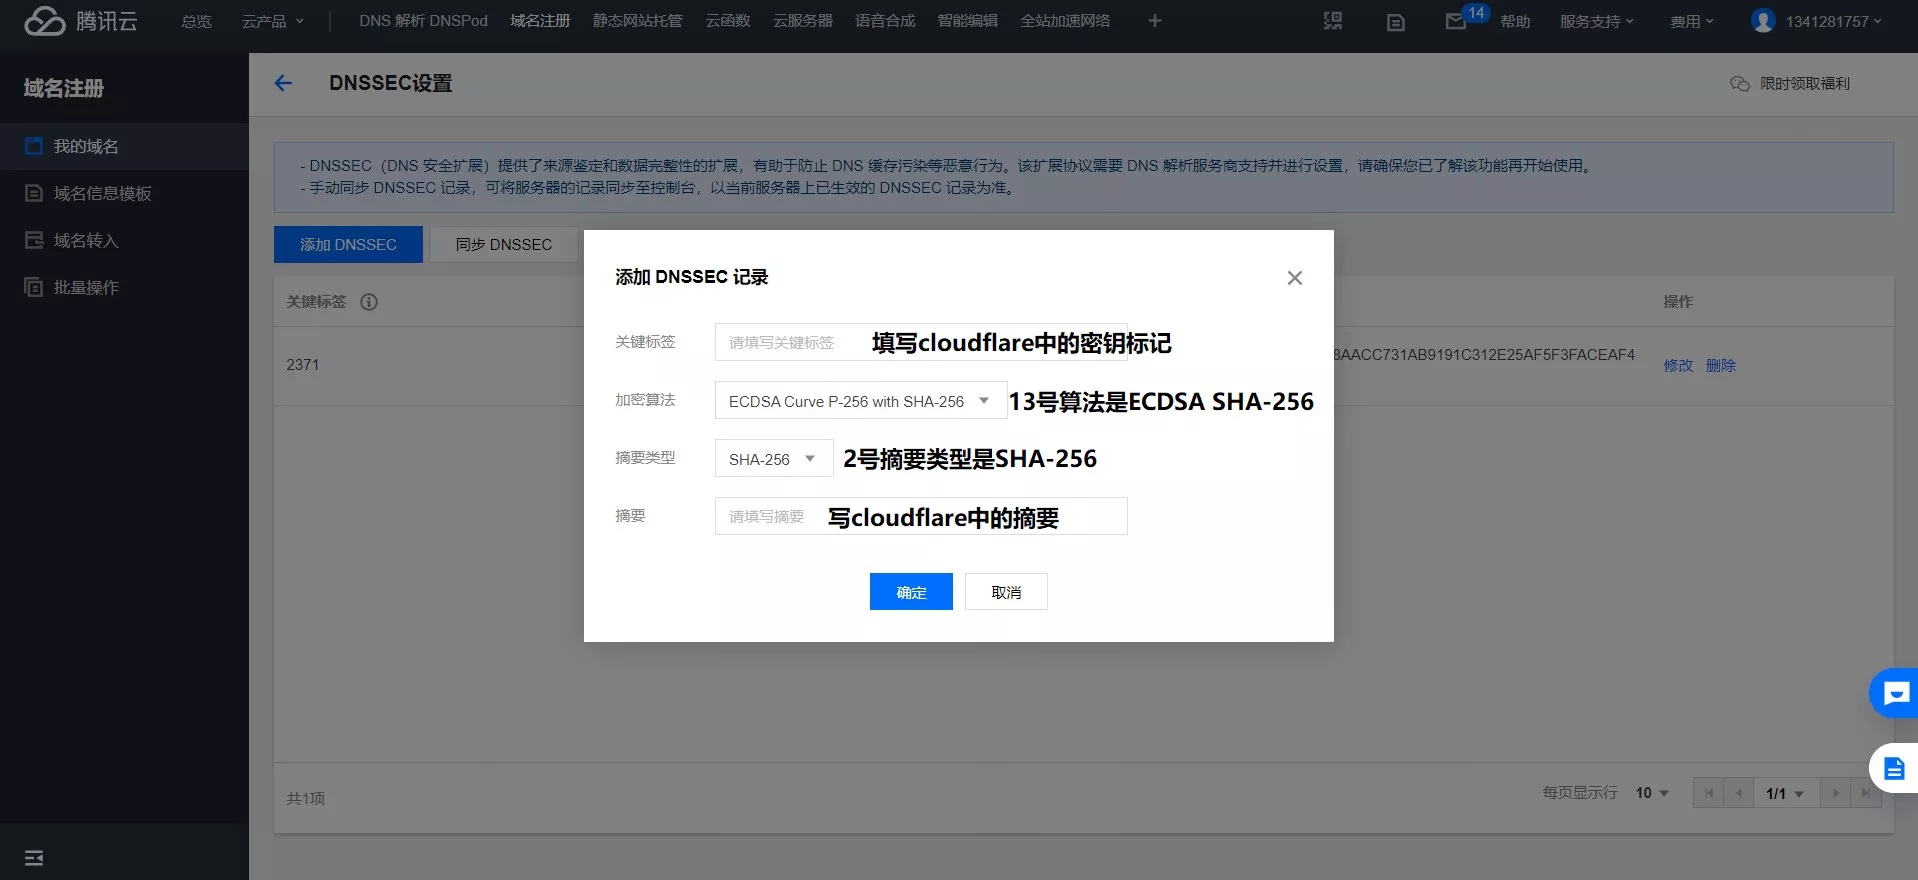
https://console.cloud.tencent.com/domain,点击域名那一栏的管理->域名安全,点击下面DNSSEC设置右边蓝色的设置。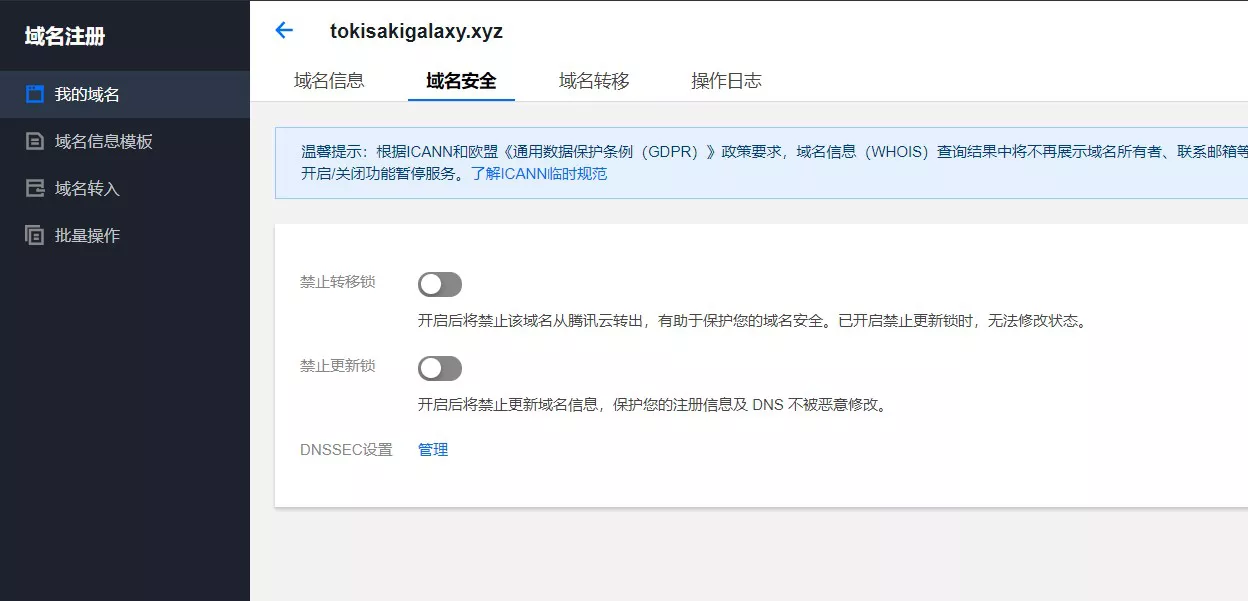
第一次进去会有个什么东西让你了解,点击了解就完了。然后按照下面输进去。
验证DNSSEC情况
回到cloudflare的dns页面,已经变成了下面这一个样子。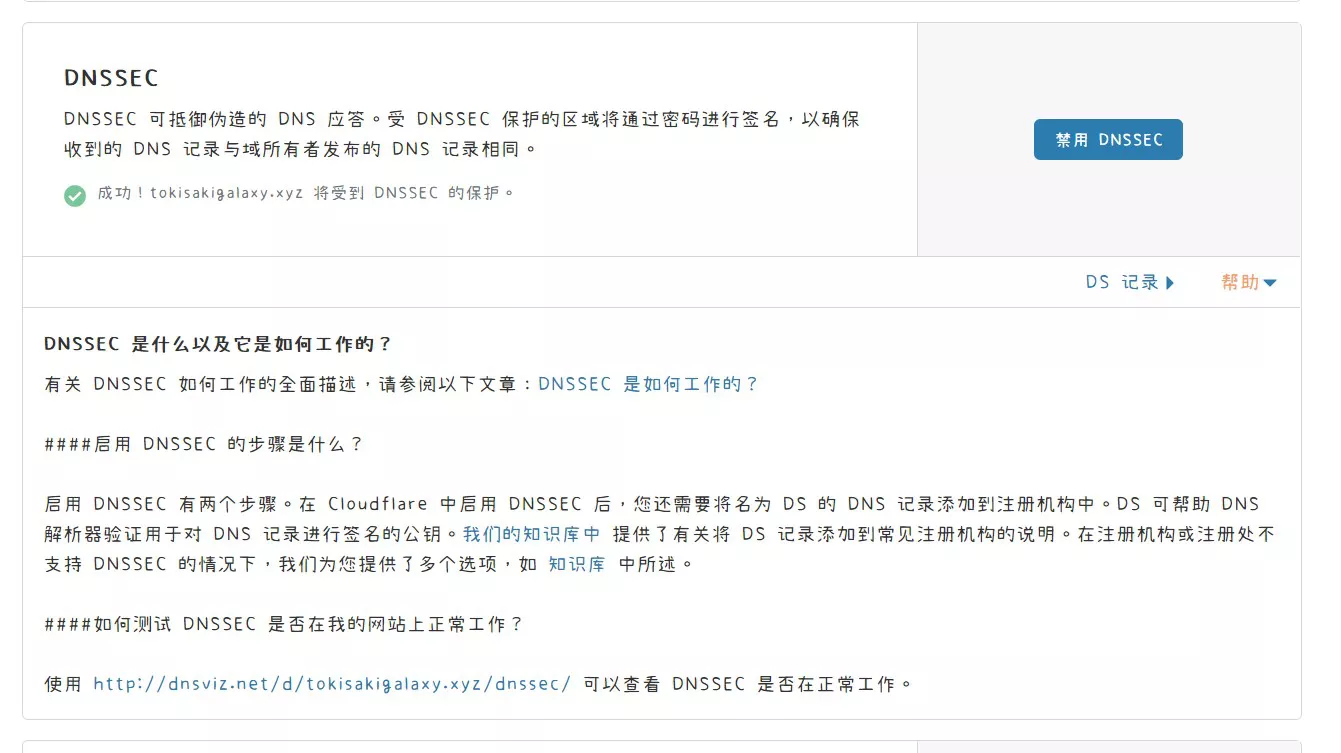
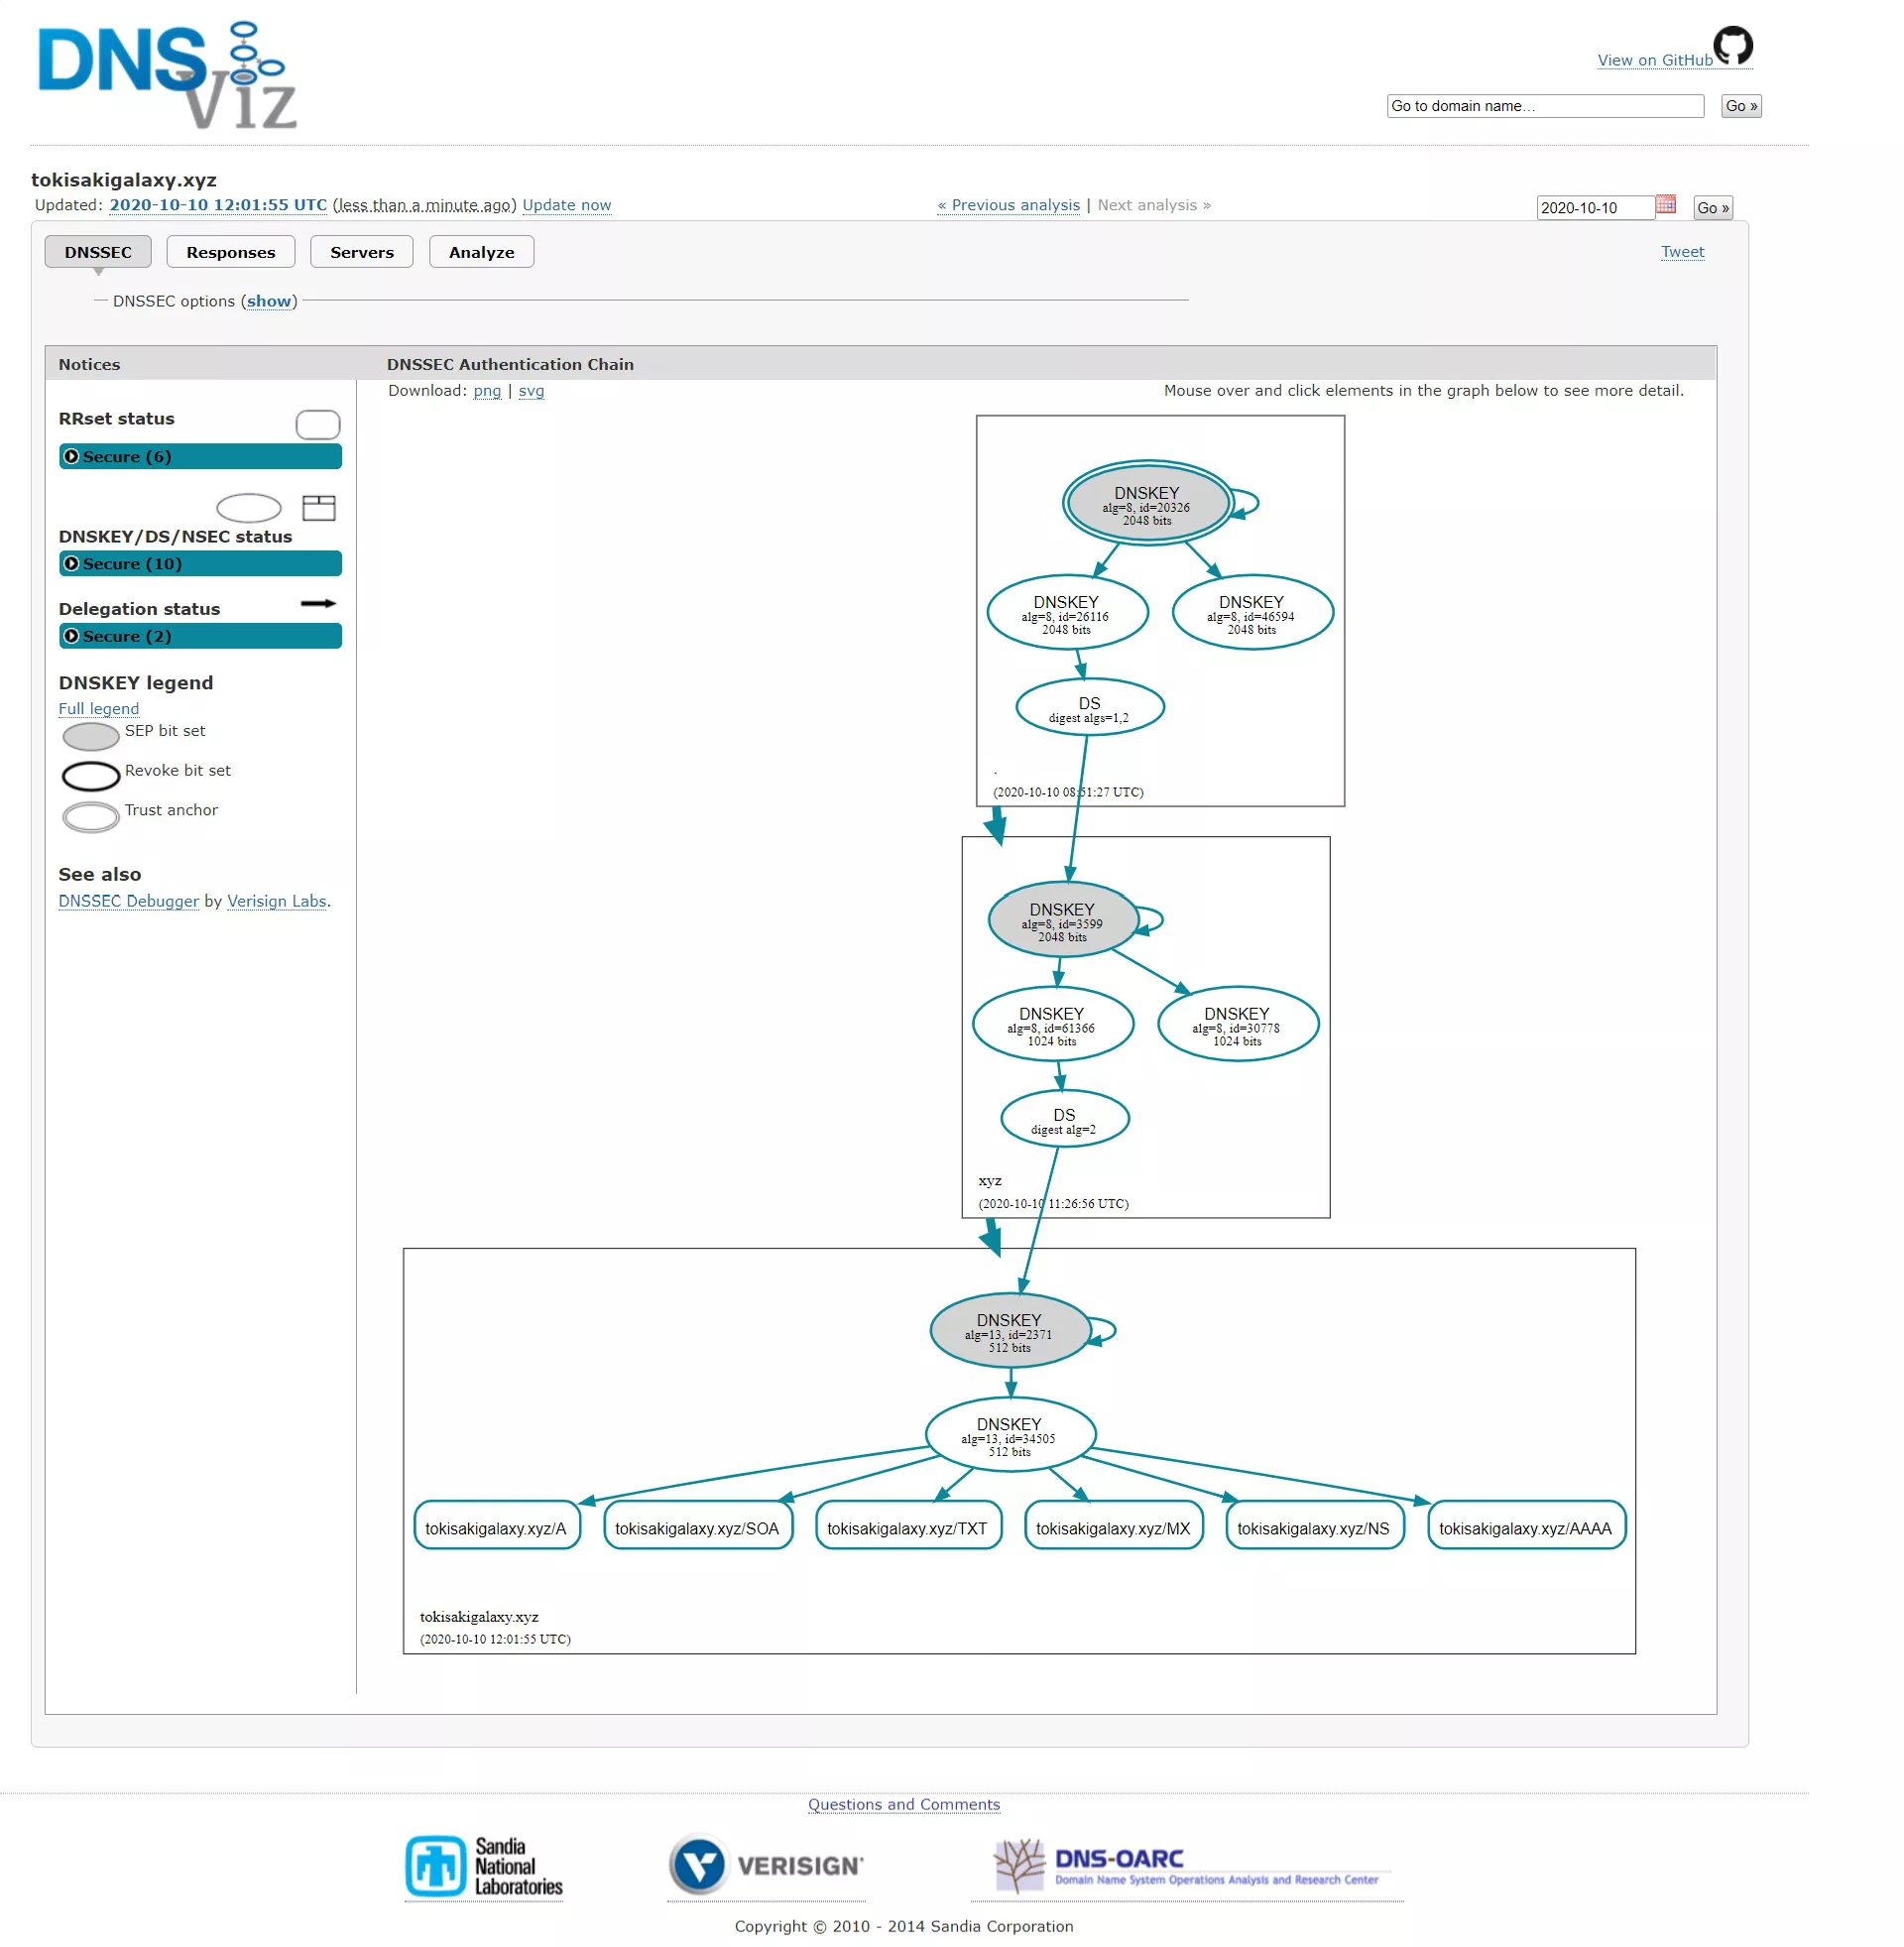
也可以使用第三方检测你的网站是否成功启用DNSSEC。
https://dnsviz.net/d/tokisakigalaxy.xyz/dnssec/
Introduction to DNSSEC
DNSSEC protects against forged DNS responses. A DNSSEC-protected zone is cryptographically signed to ensure that the DNS records received are identical to those published by the domain owner.
Enabling DNSSEC on Cloudflare
First, navigate to the DNS page in Cloudflare.
Scroll down to find DNSSEC, click “Enable,” and then click the DS Records button in the bottom-right corner to expand it.
Enabling DNSSEC in Tencent Cloud
Go to https://console.cloud.tencent.com/domain, click Manage in the domain row, then Domain Security, and click the blue “Set” button next to DNSSEC Settings.
The first time you enter, there will be an explanation prompt; just click to understand it. Then, input the following information as shown.
Verifying DNSSEC Status
Return to the DNS page in Cloudflare, and it should look like the image below.
You can also use a third-party tool to check if your website has successfully enabled DNSSEC.
https://dnsviz.net/d/tokisakigalaxy.xyz/dnssec/